Showing posts with label Fresh Herbs. Show all posts

Friday, August 6, 2010

Basil Bliss

Basil is another one of my favorite foods/herbs; the perfect complement to my personal red/orange/yellow/green or multi color Tomato bliss. I think you might imagine my next favorite, but that’s another blog, but I will say it’s always white and should be consumed fresher than fresh. ;)

There is nothing that I can think of, except maybe…hmmm, I can’t think of anything, Basil can’t go with. Now keep in mind, there are several varieties of Basil, so if you want to challenge Basil's infinite use, use it as a desert garnish, choose the right variety, like sweet or lemon basil. Choose the right basil for cooking and/or drinking liquids.

I realize that Sweet is the most common, but if you have access to the various types, use them accordingly.  How tasty would a Lemon Basil sorbet be?  I quiver with enjoyable passion of the amazingly tasteful exotic flavor.

I can tell you if you choose Sweet (which is most commonly found) or Lemon Basil, this is excellent in mixed drinks that may generally call for Mint; if you are serving a spicy drink, more spicy Basil is appropriate, like Spicy Globe or Purple Ruffles.

About a year or more ago, I went out with my co-workers after I was recently let go and we met up at this bar that served a mean Pear and Basil Martini. The bar treated the drink like a Mohito, by muddling sweet basil instead of mint, served up in a martini glass. I remember that I kept asking the bartender to add more basil to my drink until it became more basil than pear and vodka because I love Basil no matter what! The Bartender thought I was crazy!

One suggestion is a twist on the tried and true Bloody Mary-We all think that Celery is a great munch, and that should not go away as the primary green for the Bloody Mary, but if you are a spicy person, muddle in some spicy Basil as an extra special addition to give your Bloody Mary a more special kick your guests will be talking about.

Hey, a Bloody Mary is essentially Tomato Based, so adding its herbal significant other can’t hurt and not make it taste like spaghetti sauce. Remember, you’re not adding oregano or marjoram and garlic, which would ultimately make a drinkable tomato sauce concoction (which wouldn't really be that outlandish and very tasty).

But, today is about Pesto, an amazing mash of Basil, Parsley, Olive Oil, nuts, cheese and additional herbs. I learned to make Pesto the old school way, originally in a mortar, but now that I own a food processor, it makes life so much easier. So I won’t subject any of you to that old world method.

There are several ways to make pesto, and not all of them need to be basil centric, but to me, the best pestos are basil dominant. Not all pesto’s need to have cheese either; my recipe this round/post is dairy free, although my pics do show slivers of cheese as a garnish only.

The one thing to note is that this is so easy to make and if you’re a person that buys that store bought stuff, you’re really missing out on the true taste of homemade fresh pesto. I will admit, on short notice, store bought pesto’s are for just that, last minute-short notice, but honestly, if you compare freshly made to store bought, you will notice the difference. For the time it takes for you to pick out pesto ingredients to the “Pre-Made Brand”, you could have made your pesto at home 2 fold.

One major difference is that homemade, you can mix it up. You can add more or less of each of the ingredients. You are not bound to what the store bought brand has sold you. You can add different herbs for different flavors and taste that will compliment your meal or appetizer. This is why I highly suggest you start and learn to make your own.  Remember, making Pesto homemade will cost you much less than if you purchased it for a quicky to get out of cleaning extra dishes or save time on your overall meal prep.

Let's just say you are making boxed pasta, the cook time is about 8-9 minutes for "aldente".  Within the 8-9 minutes, you can make pesto in about 3-4 minutes, while the pasta is cooking.  A min or 2 to peel/crush the garlic, set up the Blender or Food Processor, add the rest of the ingredients and 1-2 min to process.

Homemade Pesto, will last in your fridge for about 5 days or more and is also freezable up to 1-2 months (honestly I’ve kept homemade pesto for 2 weeks in a tight lid container in the fridge).

BTW: The cracker in the pics are a multigrain brown rice “thin cake”. I found these in my local organic market a week or so ago…Again, I am not one to promote, but these snacks are better than the thick Rice Cakes we all think and are familiar with at the supermarket. They are a product of Belgium; Suzie’s Thin Cakes. Gluten, Cholesterol, Fat and Sugar free and they are quite yummy.


Basil Mint Pesto
  • 1 Bunch Fresh Basil
  • ¼-1/3 bunch Fresh Italian Parsely (about a handful)
  • ¼ bunch Fresh Mint (about a ¾ handful)
  • 3 Cloves Garlic (medium sized) If you are a garlic freak like I am, add 1 more.
  • 6 oz of Pine Nuts or about a handful
  • About 1/8 to ¼ cup of Extra Virgin Olive Oil (Please use the good stuff for this)
  • S&P to Taste
  • Optional: ¼ cup Grated Parm Cheese 
Add Basil Leaves, Parsley, Mint Leaves, Garlic and Pine Nuts, and Cheese (Optional) to Food processor or Blender; Pulse until a medium rough chop. Slowly drizzle in Extra Virgin Olive oil (you may not need all of it)…you should process until ingredients are well blended; pesto should not be too “wet” and should have a consistency of say, a thickened vinaigrette minus the vinegar. Do not over process! You do not want a Puree! You want to see the herbs!

Ideas on mixing it up with Pesto:
  • For Nuts Try: Almonds or Walnuts or Pecans or Cashews or hazelnuts
  • For Herbs Try: Tarragon or Marjoram or multiple varieties of Basil or Cilantro or Lavender
  • For Cheese: Any Hard Grating cheese will work; Grana Padano or Pecorino Romano or Asiago
  • Other Thoughts: Sun Dried Tomatoes or Flavored Olive Oils or Roasted Garlic or Roasted Shallots or Roasted Peppers. 
Pesto for simple and quick dishes:
  • Mix in with your favorite Pasta or even Rice as a primary sauce
  • Mix in with your favorite Tomato Sauce for an extra kick!
  • Replace Mayo or Mustard on Sandwiches, Pasta and Potato Salads
  • As per the Pics above, use as a base spread for Appetizers
  • Use as a “Dip”
  • Add to Mashed Potatoes for extra flavor
  • Even mix in with soups
 As Lidia would say “Tutti A Tavola A Mangiare!”

Monday, August 2, 2010

Risotto-PLBTG

Pancetta (P), Leeks (L), Bursting Tomatoes (BT) and Gorganzola (G), what more can you ask for in dish! I love risotto as much as love cooking it, and who doesn’t love the idea of taking an old BLT concept to an Italian rice dish!

I am going to be short and sweet on this post…I think I said all I can say about Risotto in one of my previous posts: Risotto Done in my Italian way

So, if you read my previous post on cooking risotto, you should be comfortable making different versions of this incredible dish.

Risotto with Pancetta, Leeks, Bursting Tomatoes and Gorganzola
Serves 4-6 as a main meal-can serve up to 6-8 as an appetizer
  • 2 c Arborio Rice
  • 2 Medium Leeks-Cut into ½ in slices and fully washed
  • 2-3 cloves Garlic Minced
  • A few Tbls of Extra Virgin Olive Oil
  • 1 Slice ½ inch Thick Pancetta (If you use Bacon, use about 2 extra thick slices) About 1/3 cup.
  • 12 Oz Cherry Tomatoes
  • ¼ cup Gorgonzola-Crumbled or if you like Soft.
  • 6-8 Cups Broth (you can use Vegetable or Chicken-I have used Homemade Chicken Broth for this Version)
  • 1-1/2 c Dry White Wine (Pino Grigio or Chardonnay-Buy what you would drink)
  • S/P to taste **Note if using Bacon be careful on the salt**
  • Basil-Chiffonade for Garnish 
Make sure you have all your ingredients prepped ahead of time. It will make the process easier.

Step 1: Cut your Leeks and Garlic and set aside
Step 2: Cut your Pancetta into small cubes
Step 3: Heat up your Broth in a separate pan and keep it on a very low setting to keep it hot.
Step 4: Prep your Tomatoes: In a fry pan, add some EVOO and Tomatoes over medium heat, cover and let tomatoes cook until a bursting stage…about 8-10 minutes. Set aside covered to maintain heat. –You do not want to add to rice as you are cooking it, as the tomatoes are at this point very delicate.

***This is now where you should not leave the pan at anytime***

Step 6: Pre-Heat a Large Fry pan or Dutch Oven over medium heat. (for Risotto newbies…I mean a Large. The rice will double in size as its being cooked)
Step 7: Add Extra Virgin Olive Oil and Pancetta. When Pancetta has slightly browned add Leeks and Garlic and sauté for about 5 minutes until Leeks have melted properly.
Step 8: Add Arborio Rice and sauté for another 3-4 minutes. Cook, stirring until rice becomes opaque in color.
Step 9: Add White Wine and continue to stir rice until all liquid has dissipated/soaked into the rice
Step 10: Add 1 ladle or 1 cup of Broth for each interval, continually stirring the rice and liquid…Meaning add 1 ladle or 1 cup of Broth and stir until all liquid has dissipated/soaked into the rice, then add another ladle or 1 cup of Broth…Continue this process until you get to about the 5th ladle/cup. Your rice at this point should start to have a starchy milky look to it. This is good, as Arborio rice should have that starchy milky liquid.

***IMPORTANT***

Now for the first taste test…The Rice should be Aldente-“To the Tooth”…Which means that the rice should have a little bit of a bite, but not too much. You want the slightest resistance of the rice. If your rice is still crunchy that you can taste the crunch more than the rice itself, you will need to add more liquid. At the 5th Ladle/Cup, you should start to taste. Make sure you keep on tasting prior to each broth addition from this point on!

Step 11: Continue to add the remainder of your broth (you may not need to use all of it) until rice is done and turn heat off.
Step 12: Add Gorgonzola cheese…Stir until everything is incorporated or until cheese has melted.
Step 13: Serve Risotto, and add a few Tomatoes on top of rice and Basil as the garnish.

Cin Cin!

Sunday, July 11, 2010

Tapenade my Whahhhhht?

Get ready to spread your love all over the place with the versatile French based recipe called Tapenade. Don’t know what Tapenade is? Well, I pity the folks who have never experienced this versatile and extremely tasty concoction.

So, it was in the early morning/late evening, oh who am I kidding, it was I thing around 2—3am, I was watching and flipping channels and came across a repeat of Alton Brown’s Good Eats on Olives. Unfortunately, the recipes from this particular show are not on the FN website (I checked!), which is a shame. Sorry FN, but if you repeat shows from years back, better ensure the recipes are still on the site, otherwise, stop repeating them! But no worries, for specific ingredients or measurements, because if you ultimately know the basics, you can pull it off.

This is a No Cook, No Bake and even Non Dairy recipe, but Vegans beware, this does have anchovies. Yes, you can make Olive tapenade without Anchovies, but the taste is not the same if it’s a culinary distinctive taste for the real thing (I’m holding my rants about Veggies and Vegans back right now).

Dictonary.com describes it as:
ta•pé•nade (tä'pə-näd') n. A spread of Provençal origin consisting of capers, black olives, and anchovy’s puréed with olive oil.
My personal Webster’s New World Dictionary of Culinary Arts describes it as:
TA-puh-Nahd; ta-pen-AHD;
A thick paste made of capers, anchovies, olives, olive oil, lemon juice and seasonings from France’s Provence region; used as a condiment, garnish and sauce.

Both are correct, but Dictionary.com doesn’t go further by explaining this is just more than a spread. Tapenade spread is not just for crudités or bread anymore, but can be used in many food applications, especially when it comes to fish. What both neglect to add is what those “Provencial” seasonings are; the seasoning basics include: Garlic, Parsley, Lavender, Chervil, Tarragon etc. Lavender really does give a distinct flavor.

What you should know is that these ingredients are all subjective in the world of culinary adventures in today’s world. I personally like foods in the original origin, however when there is a food that can span other culinary nations, I’m all for “spreading” the knowledge around. Even though France is the country of origin for this amazing spread, the ingredients are so very Mediterranean in origin, which means that multiple countries can claim their own version, which is great for all of us and my Italian twist on things!

Tapenade is not just a spread for crusty bread or appetizer bound. Tapenade is an amazing spread to replace Mayonnaise and/or Mustard for sandwiches, and can also be a great crust for meats, fish and chicken. As Alton Brown put it years ago (It’s not an exact quote),”there ain’t nothing this food can’t go with!”

I recently made a huge batch of Tapenade (Italian Style) and because I made so much, gave half away to my friends/owners of my local bodega. The beauty of Tapenade is that it does last a long time if stored correctly. Up to a year in the Fridge, believe it or not!

My whole point to this post/blog is that you should not be afraid of such a “French/Culinary” food called “Tapenade”. This is the easiest condiment/spread to make. This really for those who are beginner cooks and this recipe should be the standard to general cooking.

Tapenade is such an incredible and easy recipe these days vs. what I remember, w hen I first learned about it. It’s like making Pesto, Salsa, Guacamole, and can be prepared quicker than cooking spaghetti (depending on the olives you get)! If you have 10 minutes or less, you can make homemade Tapenade, provided you have a food processor or blender to make your life easier.

BEWARE: Tapenade has a Strong and Condensed Flavor! A little can go a long way!

My Italian Tapenade Recipe (off the top of my head..All ingredients are approximate…If followed exactly about 10-12 servings or more-this is my guess):
  • 1 Pint Alfonso Olives (pitted)
  • 1 Pint Sicilian Olives (pitted)
  • 3 Cloves-FRESH Large Garlic
  • ½ Bunch FRESH Italian Parsley
  • ½ Bunch FRESH Basil
  • 2 Tsp Small Capers (Salted or in Brine)
  • 1 Can or Jar of Anchovies in Olive Oil (Only need about 4-5 anchovies)
  • ¼-1/3rd cup Extra Virgin Olive Oil (Note: add by eye…You do not want the mixture to be too wet or too dry.
  • S & P to Taste
Optional:
  • 1 Tsp Dried Provencal Herbs with Lavender (The lavender brings an amazing distinctive flavor)
So, if you have a Food Processor or Blender, please follow these instructions:
  1. Add Olives, Capers, Anchovies, Garlic, and Herbs to food processor, pulse to medium grade chunkiness.
  2. Start the the Processor or Blender again with a low setting (or use your “pulse instincts”): Start streaming in Olive Oil slowly until mixture is fully incorporated, but not liquefied or like a hummus/smooth texture. The texture should be slightly chunky.
  3. Store in proper locking containers in the refrigerator. Apply to fish or meat marinades, substitute tapenade for Mayo or mustard or just enjoy on a good slice of bread on its own.

Monday, June 21, 2010

Sardines Revisited

When I first started this blog, I posted a quick write up on how I love Sardines (Saltines and Omega 3) and the fact that I think they get a bad rep. I also posted a link to an Alton Brown, Good Eats recipe “Sherried Sardine Toast” that I had not tried out at the time, however recommended to folks who are willing to eat these lovely little fishes.

Well, I took the plunge and tested out this recipe and OH MY TASTE BUDS! The Alton Brown episode was extremely mouth watering, especially if you are a person who loves to eat sardines like me, but at the same time it does not do the justice it really deserves until you taste this wonderful snack/lunch and even more.

I personally had this tasty delight for what I call “Lupper”, the time between a late lunch and supper, which is generally when I eat, as I am not a big breakfast or for that matter a big lunch eater. I mainly see myself as a dinner hound and the occasional over the sink/counter eater.

Not to get off subject, but did you know that there is a difference between Supper and Dinner? Well, there was in my family according to my Nana on my father’s side. Supper was the feast between 4pm and 7pm on holidays and Dinner was any meals eaten a few hours later-between 7-9pm. Now…Don’t have a frenzy, I know this is backwards as the dictionary is Dinner first, then Supper. But hey, I loved my Nana (even though not that educated) and that’s how it was in my family.

So, back to the Sherried Sardine Toast…Again, WOW! I really think, if you are a person who may be a bit squeamish about sardines, to try this recipe out. The toast and the smooth buttery taste of the Avocado; with the initial splash of the sherry vinegar on the tongue really tones down the Sardine fishiness. I even believe that if the canned Brisling Sardines are still not something you want to be adventurous with, try just canned tuna in oil as a starting point. I might even try this with anchovies and add some small capers (not caper berries-but hey this could work too)!

So the pictures I have posted are not exactly the "Toast" the recipe calls for exactly, but at the time, I only had what I had.  So that should tell everyone that you don't necessarily have to have a boule to make this treat.  I used an italian long loaf of bread and cut it in long wedges, which is actually perfect for the snack/appetizer form which will yield 8 smaller slices instead of the bigger 4 the original recipe recommends.  For a more substantial meal, then use a thicker loaf of crusty bread as stated.

So, be adventurous for the rest of this month! This recipe is perfect for a Snack, Appetizer and if you are like me, perfect for “lupper” and a late night snack!  Just keep in mind, this is a recipe that does not store for more than the day you prepare it. Yes, you can make half (the toast should be prepared as you serve it)  for the early part of the day, but best make and eat the next half before the day ends.


Sunday, June 13, 2010

Cool your Cucumbers! Will ya?

Hi folks, sorry for the long delay in posting a recipe. Been kinda busy these days and like in my previous post, the foods I’ve been preparing and/or eating haven’t been all that exciting to write about.

As much as I love to cook, I still can’t figure out how all the chefs in the world can cook in such a hot environment through the summer months. Granted, you do lose a lot of weight, as it’s like being in a sauna somewhat, but try being in a sauna for eight or more hours straight. I know I can’t do it, that’s one reason I never went into the culinary arts profession.

With the real summer officially on the way soon (June 21st) and with more and more Hot and Humid days to come, cooking hot meals in the kitchen are just too much to take (FYI A Science Fact: After the Summer Solstace the Light loses 1 Minute a Day until the Winter Solstace, then the 1 Minute is gained again until the Summer begins again!). Eating hot meals in the summer months has somewhat always been a bit unappealing appetite wise for me and I am always looking to expand my main dish repertoire to cool and refreshing dishes that minimize the usage of heat.

I love using a grill, but I’m in an Apartment with no back yard to place a grill. All I’ve got is a grill/griddle to place on my stove top and even that generates a lot of heat, even with the AC on in my kitchen! If I can’t stand the heat, should that really mean I should get out of the kitchen? I think not and neither should you!

The other day I had been talking to one of my recruiters whom I gave my blog address to view my recipes. Turns out we had a lot in common when it comes to certain foods. She had checked out the Chilled Tomato and Avocado Soup and then we started discussing Russian foods, as she was from the Ukraine. She mentioned she had a few recipes for me, but I couldn’t wait and started looking for a Chilled Cucumber Soup recipe we had discussed, on my own.

So, my cold cucumber soup craving lasted for several days until I couldn’t stand it anymore…I found several recipes and like I usually do, take bits and pieces and modify. I can’t remember where I actually got this recipe from so sorry if I don’t provide an original link, but here is my modified version.

Please note this is not a “Dairy Free” recipe, but it IS a No Cook, No Bake recipe. However, you can substitute certain ingredients, which I will mention in the Ingredient list.
Chilled Cucumber & Dill Soup
Makes approximately 4 servings
Special Equipment: Either a large Blender or Food Processor.

Ingredients:
  • 1 Tsp Fresh Dill (You can use ½ Tsp dried if that’s all you have)
    • Note: You can switch the Dill out for other Herbs such as: Mint, Tarragon, or even Lemon Thyme for a very distinct flavor. If using fresh herbs, I opt for double the dry measurements.
  • 1 Tbsp Worcestershire sauce
  • 1 Tbsp lemon juice (One Medium Fresh Lemon)
  • 1/2 Tsp celery salt (can use Sea Salt, but the celery salt provides a distinctive flavor element Salt cannot)
  • 1/4 Tsp pepper or try white pepper only
  • 2 green onions, coarsely chopped
  • 3 medium cucumbers, peeled, seeded, and coarsely chopped
    • Note: I used Kirby Cucumbers as they are my favorite. I used a total of 9 Kirby’s, reserving 1 Peeled but not seeded for adding a chunky element to the soup
  • ¾ or 1 Cup of sour cream or plain yogurt
To Prepare is extremely simple…
  1. Add all ingredients in the order listed except for the Sour Cream/Yogurt to your Blender or Food Processor.
  2. Pulse the ingredients until fully puréed. Once puréed, add sour cream/yogurt and pulse until combined.
  3. Place soup mixture in a glass or plastic bowl (Metal bowls are not good storage for this type of soup) in the refrigerator for 4-6 hours (24 would be even better-especially if using dried herbs) until well chilled. BTW: This soup can last for at least 4 days in the fridge. I wouldn’t recommend freezing this.
  4. Serve with a sprig of the Herb of choice and I would even go as far as drizzling a fragrant Olive Oil if that fancies you.
Enjoy and eat Cool!

Thursday, April 22, 2010

Beet the Blood Orange for Luv! It’s OK, It’s Earth Day!

I can’t remember when I didn’t love beets, but I am sure my parents would tell me otherwise. Beets are such an amazing vegetable, but I think they should call it a fruit as it is so full of sugar!

Did you all know that some commercial sugar products are primarily made of Beets? Almost half of the sugar we buy is made from beets. Yes, regular white sugar is not just from Cane Sugar, it’s from special sugar beets! Beets are an integral part of our food industry we would have never, ever thought about. This is why we should watch and read what the food industry puts forward, so we can change the overall process of foods we eat. I found out about the process of sugar from Modern Marvels, a truly great show about so many things!

No matter, red, yellow or tri color beets are a favorite of mine and I love them in very simple and flavorful meals. My first and foremost favorite is the classic borscht, cold of course, with a dollop of sour cream and the occasional boiled potato. I’m lucky that I live in NYC, as it would be harder to find classic Russian and Jewish foods without the best Deli’s in the world!

Back in the day, I found this grilled salad vegetable recipe, which I hope to post during the summer, included roasted beets from the grill, with many other exciting vegetable flavors that continually runs in the back of my mind. This grilled salad was the best I ever made and again, as time passes, I lost the original recipe, but this one is not so hard to forget. I do hope to make this soon, but as an Indoor Grill process.

So, we are in early spring and its Earth Day today! I have a great beet and blood orange salad that will satisfy everyone’s fanciful taste buds until the summer grill comes out. This is my concoction, but it can and should be modified to your taste. Realistically, this is all about the vinaigrette which can be used as a marinade or on other salad mixes.


Beet and Blood Orange Gremolata Vinaigrette
6 Servings

For Vinaigrette:
  • 2 Blood Oranges (Zested, and Juiced. Slice each in halves…Saving one half for Salad)
  • 3-4 Cloves Garlic (Smashed)
  • 1 Bunch Italian Flat leaf Parsley (Take Leafs Only)
  • 1 Cup Extra Virgin Olive Oil
  • 1 Tsp/Small Splash of White Wine or White Balsamic Vinegar
  • S & P to Taste 
Salad Ingredients:
  • 16 oz Baby Beets-Steamed and Peeled, Then Sliced
  • 1 Sm Pkg Pea Sprouts, 1 Pkg Mache-aka Lambs Lettuce (if not available…2 Pkgs Micro Greens )
  • Approx 10 small Artichoke Hearts (Not Marinated, can be canned or jarred or frozen)
  • 1 Sm Pkg Grape or Heirloom cherry Tomatoes (sliced in Halves)
  • 1 Can Hearts of Psalm (3/4 of Psalm cut in slices)
  • ½ Blood Orange Pulp/Sections (Left over from Dressing)
  • 2 oz Plain Goat Cheese (or Goat Cheese of your choice) Crumbled 
Blood Orange Gremolata Vinaigrette Prep:
  1. Grate/Zest Both Blood Oranges and set Zest aside. Juice 1 1/2 of the Oranges.
  2. Take Garlic and Smash, then chop roughly
  3. Take Parsley Leaves and chop roughly
  4. Add Blood Orange Zest, Garlic and Parsley and chop all ingredients together, finely. This becomes the Gremolata.
BTW-You can do Steps 2-4 in a food processor or blender. Just remember, ‘pulse’ until fine.
  1. Add Gremolata to a Bowl or Jar.
  2. For Jar, add Blood Orange Juice, Olive Oil, White Vinegar, S & P, close cap and shake vigorously.
  3. For Bowl, add Blood Orange Juice, Olive Oil, White Vinegar, S & P and with a whisk, mix vigorously and place in Fridge for approximately 2 hours. 
For Salad Prep…This is the easy part. There really is no order to placing the ingredients.
Just place the following in a large salad bowl:
  • Beets
  • Mache or Micro Greens
  • Artichoke Hearts
  • Tomatoes
  • Hearts of Psalm
  • Blood Orange Pulp/Sections
  • Crumbled Goat Cheese 
Finally, when ready to serve, add Blood Orange Gremolata Vinaigrette to desired taste, but only add minutes prior to serving or salad will wilt. Tip: The dressing goes along way and you don’t need as much as you think. When adding Vinaigrette, use a little at first and mix with clean hands. You definitely want to be delicate when dressing all the salad.

HAPPY EARTH DAY EVERYONE!!!!

Tuesday, April 13, 2010

I Confess! I was a Tomato Thief!

Of all the foods I have eaten in my life, the Tomato is to me the most endearing and favorite fruits/vegetables of all time (I call it a fruit). I eat heirloom, regular, cherry and grape tomatoes like candy! I am a sucker for homegrown heirloom Tomatoes of any variety and this story dates back to one of my earliest memories of one of my favorite foods of all my time. It’s a long post, but I promise an amazing recipe and hopefully a funny story will come out of it!

I think I was about 7 years old; the place was Newtown, Connecticut. My parents were still together and my sister was just someone I could bully, being the big sister that I was. We lived in a beautiful converted barn (yes it was painted red and the details white!) that stood on top of a U shape dip with what seemed to be a high hill at the bottom of the street where the best friends, at the time, of me and my sister lived.

There was a little creek (if looking at our street from the north) on the left bottom side of our U street in the back woods where my father would on rare occasions take us fishing for “so called trout” with stick poles and fishing string. All we ever caught were teeny minnows (I think) and the occasional frog and salamander.

On the upper right street, the house semi across from us, I remember always seeing Red Breasted Robins eating the worms and seeds from that front yard in the early morning. The house at the top of the street (between the inbound and outbound roadway and facing the main road) always had a great garden of Rhubarb every year. I think I remember the woman gave us some of her garden feast at some point. She must have, as I do remember Rhubarb Pie and other Rhubarb tastes like eating raw Rhubarb coated with sugar!

But on the far left middle side of our U shape street, there was a family/home that had a garden I was definitely more interested in. They had a garden of TOMATOES!!!! I think I remember the family that lived there, but not too sure. I want to remember it was the family who had this baby girl Megan (2 yrs old) who when us stupid kids asked her to say “Truck” she would say “F@#K”. Us kids at the time got a huge kick out of that (Hey, it was the late 70’s)!

No matter, this was MY GARDEN. My home had great stuff to pick from like peas, blackberries, pears, mulberries, crab apples and other stuff my father and mother planted. But not like this garden down the road. This garden was a plethora of tomatoes for me.

So, in early morning and late afternoon, I would sneak into this open garden and just pick the tomatoes from the vine and eat them trying to hide myself between the stalks/vines. I do remember being sneaky about being in the garden worried that someone would catch me. I remember going to the garden and just grabbing as many tomatoes as I could and running away and then devouring them before I went home. I did know I was doing something wrong, but I just loved those Tomatoes so much!

What I most remember aside from stealing the tomatoes is really about the fact that I just grabbed a tomato from the vine, and sunk my teeth into a most glorious fruit! As a child, I could not get enough of these Tomatoes; the taste to this day, when every bite into any tomato, it is hard for me to accept as I equate my taste bud memories to what I am eating presently.

When you taste that freshly picked fruit and just bite into it, there is no comparison to what’s out in the markets today. My buds tell me I must smell the vine on the fruit first, and then when you bite in like you would a peach its sweet…It’s so hard for me to explain, as it’s such a mind game for me. I am not sure I can give the tomato the justice I want to give it from my mind…there is no need for sugar or salt to bring out the taste as it’s all so natural to just eat it raw, just like a peach.

Well, that’s my story, I did try to keep it short, and hope you all enjoyed the read, but there is the real reason I started the discussion of Tomatoes. We are coming into spring and soon summer will be upon us. Yes, Tomatoes are best in July/August, but starting in May, you can start to purchase really great homegrown tomatoes. Please buy from your local farmer and not the supermarket!

As I mentioned on my other Page "What am I Cooking Next", I was going to cook for a special occasion and I did, just this past weekend. It was my Brother In-law’s B-Day. Technically, my sister and her bo are not married, but they have been together long enough for me to say he is definitely family. Because he is family and I have no money to really give him a proper gift, my gift is cooking. So I cooked a 3 course meal that included the Ravioli I posted a few days back, Soup and a Salad. The salad story will be posted soon.

My Brother in law mentioned to me that he was given last summer’s preserved tomatoes from his mother who resides in Indiana and that gave me the idea for a nice spring soup to prepare for him. So my sister is still on her vegan diet and I did try to search for a Tomato recipe that wasn’t salad based and I really did want to make a soup. I scoured the web and my cookbooks for a chilled tomato soup that was not dairy or bread based and wasn’t gazpacho.

I will tell you all, unless you really know where to look, real unique Tomato vegan recipes are hard to find. I am sure any vegan reading this will tell me otherwise. But I wasn’t just looking vegan, but a recipe any one would enjoy overall.

So I did ultimately come across a Chilled Tomato and Avocado Soup recipe, but it did require a dairy product. So, what I ended up doing is omitting the dairy and changing things up in the recipe. This resulted in a No Cook, No Bake, No Dairy, No Bread Recipe. I will link you to the original recipe I modified greatly from…In case you want the Dairy version. But I’ve got to say, my version is so much better and healthier for you overall.

NOTE: For the Tomatoes…I had the privilege of using preserved homegrown Tomatoes, but canned will work. For canned, be sure to remove the tomatoes to a glass bowl and chill for 24 hours to remove the tininess.

Original Recipe Link (BTW-There are many links of the same recipe out there, this is just one of them.)

My Chilled Tomato and Avocado Soup-Revised and more Original.
Makes approx 8 Servings

Special Equipment: Either a large Blender or Food Processor. If you have a Medium Blender, you may have to do this in batches. Using a Handheld Stick Blender doesn't work so well, but if that's all you have, then go for it!
  • 32 Ounces Whole Canned or Preserved Tomatoes with Juice
  • 1 Large ripe Tomato (Beefsteak or Ugly Heirloom) or 2 Medium Hydroponic Vine Ripened Tomatoes-Roughly quartered
  • 4 Ripe Avocados (2 should be quartered/sliced for the soup base)
  • 1 Medium Onion-Roughly quartered
  • 1 Large Red Pepper or 2 Med Red Peppers-Roughly quartered
  • ½ Cup Lemon Juice (Real Lemons-No Lemon Substitutes)
  • ½ Tsp Cayenne Pepper
  • 1 Bunch Chives
  • S & P to Taste
  • Optional: Fruity or Spicy Extra Virgin Olive Oil
Preparation:
  1. Add ¾ of the Canned/Preserved tomatoes (Reserve ¼ of tomatoes), Fresh Tomato, Avocado, Onion, Red Bell Pepper, and lemon juice to Blender/Processor
  2. Puree until smooth.
  3. Transfer Tomato and Avocado mixture to large bowl.
  4. Take canned/preserved tomatoes and roughly chop keeping the pieces bites size, but not too small. Whisk in remaining canned/preserved tomatoes to Tomato and Avocado Mixture.
  5. Season with cayenne, salt and pepper to taste and chill for 2 to 24 hours.
  6. Garnish individual servings with remaining Avocado (Sliced), chopped chives, and optionally a drizzle of Extra Virgin Olive Oil.

Saturday, April 10, 2010

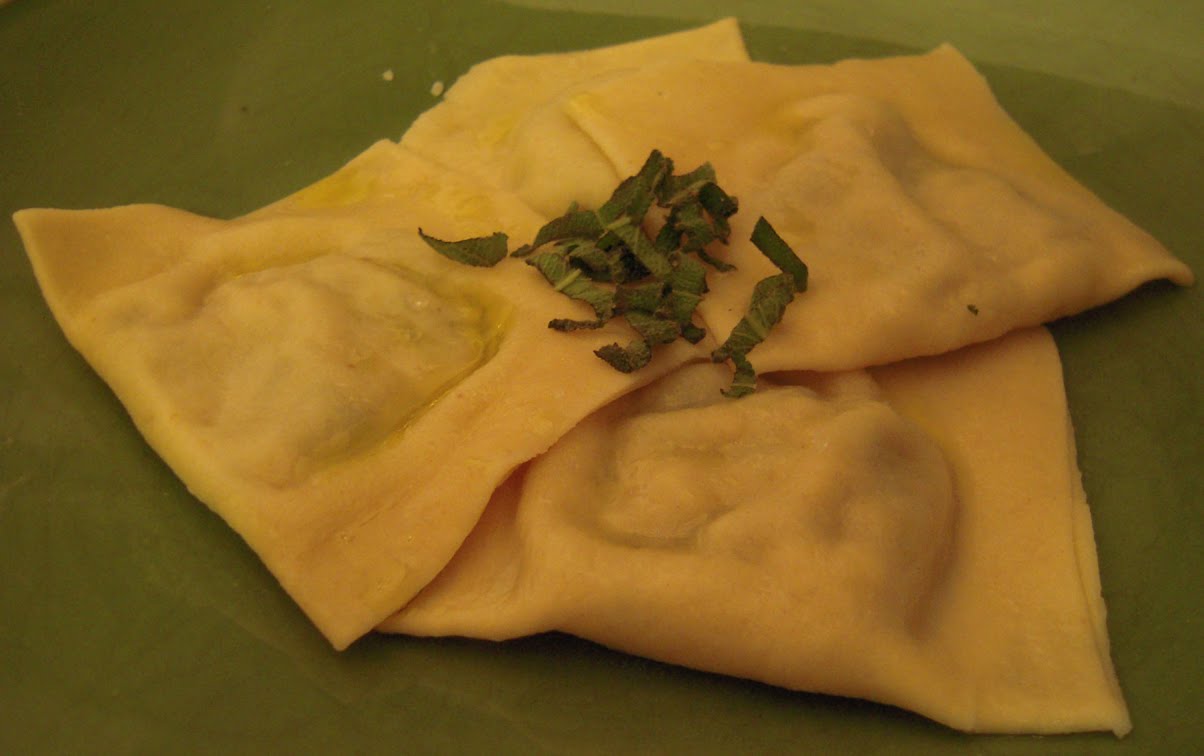
Ravioli That Brings the Forest to You

Years ago, I had been given the opportunity by my mother and step father to cook a few appetizers for some special occasion. I cannot remember exactly which occasion it was, but as someone who was trying to find new and updated recipes, I in my controlling enthusiasm, had to dictate what I would prepare.

Now, at the time my parents gave me this opportunity, their budget was fairly reasonable and tolerant of my quest to attempt new recipes and expand my culinary talents. All recipes had to be within a reason, but I will say, if it weren’t for my family’s appreciation and support towards my cooking hobby, I would not have come up with this ravioli recipe. Keep in mind, I also had to figure in a vegetarian dish due to my sister’s and other guest’s needs.

The original recipe was really something I found in one of the major cooking magazines, can’t remember which one, and was a recipe for a Phyllo Dough appetizer that was a plethora of Wild Mushrooms, Herbs and Goat Cheese. When I made the Phyllo Dough recipe, it was so awesome. I could not believe how good it was. But, as I loved this recipe, the filling was really the star for me, although the Phyllo was such an amazing compliment. Because I had such a craze for the filling, I thought it would be a great filling or ravioli.

So, I decided one day to prepare the filling as per the Phyllo Dough recipe and use it as a filling for my homemade ravioli. Not only did this work with the pasta, it was such an amazing taste in Ravioli, I had never seen or tasted from any Nuevo restaurants I have eaten at. To this day, after about 15 years later, I still have not seen a ravioli recipe like I am about to post. I have also not seen this recipe in print, specifically for ravioli or even any other recipe other than what I discovered years ago with the Phyllo Dough.

So any of you reading this, this is truly a new recipe that I am aware of. I consider this one of my major accomplishments of recipes of my own doing and I hope that all of you will enjoy this treat! What you should all take away from this recipe and post is this is really about the filling. Think about other recipes you have made which call for a “filling”. Experiment and consider standard Filling recipes as just a Filling and try it with other recipes that call for “Fillings” to go along with other cooking methods.

A few things I must state about the Ravioli Recipe:

The best way to serve is with a drizzle of REAL Black or White truffle Oil and S & P and a light sprinkle of Parm Cheese Only. If you can afford it, shavings of REAL White or Black Truffles along with its complimentary oil is best. Top with a chiffonade of fresh Sage.

However, if you on the cheap, a drizzle of Extra Virgin Olive Oil, S & P and a light sprinkle of Parm Cheese will be just as tasty (which is on my budget these days). Top with a chiffonade of fresh Sage.


Pasta Recipe 2lbs (or use your personal one).
Will make about 34-35 Large Ravioli (about 2x2).

I will not go into methods of making the pasta. You can attempt 2 ways… By making a flour well and mixing all the wet ingredients by hand or use a Food Processor which will cut your kneading time in half.
  • 2 C AP Flour
  • 1 C Semolina Flour
  • 1 ½ Tsp Sea Salt
  • 4 Large Eggs (Room Temp)
  • 1Tbls Extra Virgin Olive Oil 
Mushroom Filling 2-4 Lbs of Pasta (can be prepared 1 day ahead)
  • 8 oz White Button Mushrooms-Chopped/Diced
  • 3.5 oz Shitake Mushrooms-Chopped/Diced
  • 8 oz Baby Bella Mushrooms or 3-4 medium Portabella Caps-Chopped/Diced
  • 3.5 oz: Oyster Mushrooms-Chopped/Diced
  • 1 Small Onion-Chopped/Diced
  • 3 Large Garlic Cloves-Chopped/Diced
  • 2-3 Tbls Fresh Rosemary-Chopped
  • 2-3 Tbls Fresh Oregano-Chopped
  • 2-3 Tbls Fresh Sage-Chopped
  • 2-3 Tbls Fresh Thyme-Chopped
  • 2-4oz Packages of Plain Goat Cheese At room Temperature
  • ½ C Dry White Wine
  • 2-3 Tbls Extra Virgin Olive Oil
  • S & P to Taste 
In a large skillet on medium heat add Extra Virgin Olive Oil, Onion and garlic and sauté until onions are slightly translucent.

Add all mushrooms to skillet and continue to sauté until mushrooms start to sweat a little. Add White wine, S & P to taste and cook mushrooms until all liquid is gone.

Transfer mushroom mixture to a mixing bowl and let cool for about 5 minutes. Then add goat cheese and herbs and mix until well incorporated.

Chill mixture for 3-4 hours or overnight for filling to set.

Once the mixture is chilled, prepare your pasta dough in single sheets and add about 1 ½ Tbls of mixture onto dough and cover with a second pasta sheet or if the pasta sheet is wide enough, fold over, sealing with egg wash.

The ravioli can be frozen for later use or you can cook it right away.

Saturday, March 27, 2010

Garlic Focaccia-Better not have a Date Tonight!

I believe that in any kitchen, there must be some standard food staples you must have and never be without. Extra Virgin Olive Oil, Parmesan Cheese (not from a jar or can), Onions, Potatoes, Lemons, Tomatoes, eggs, flour and most of all lots and lots of Garlic!

When I started cooking, I made it a point to always have garlic in my kitchen. Not only does it go in almost every dish I cook (except sweets of course), but garlic is super healthy for you. Now most believe it’s not a good idea that if you eat lots of garlic, it’s not a good idea to go on a date with someone, but if that someone loves garlic too, then I think 2 garlics make a right.

So, I’ve been playing with my bread machine again, and the focaccia recipe from the booklet is pretty good, but I’ve taken it a few steps further and mix in some fresh garlic to make the bread even tastier. If you don’t have a bread machine, using frozen pizza dough will work or even if you have your own focaccia recipe just knead in fresh chopped garlic into the dough before your final rise.


Ingredients for Bread
Makes 1 1⁄2 pounds
  • 1 1/8 cups Water, 80°–90°F
  • 2 Tbsp + 1 Tsp Extra virgin olive oil
  • 2 1⁄4 Tsps Italian herb blend
  • 1 1⁄2 Tsps Salt
  • 3 cups + 3 Tbsp Bread flour
  • 1 1⁄2 Tsps Yeast, active dry, instant or bread machine
  • ¼ cup Garlic-Freshly Chopped **Mix In**
Place all ingredients, in the order listed or per your machine’s instructions, in the bread pan fitted with the kneading paddle.

Select Dough/Pizza Dough. Select dough size. Press Start to mix, knead and rise. If you have a “mix in” option, make sure this is turned on. When “mix in” option beeps, add Garlic. If you do not have a “mix in” option, about 10-15 minutes into the first cycle, add the garlic. When full dough cycle is completed remove dough from pan, punch to deflate and let rest 10 minutes before continuing.

Ingredients for topping
Makes a 12x8 or 13x9-inch focaccia
  • 3 Tbsp Extra virgin olive oil
  • 3⁄4 Tsp Coarse kosher or sea salt
  • 1⁄3 cup Freshly grated Parmesan cheese
  • 1⁄4 cup Chopped fresh herbs (oregano, thyme, rosemary, sage)
Brush a jelly-roll pan with olive oil (Optional-sprinkle with cornmeal). After dough has rested, roll out on a lightly floured surface to the appropriate size and place in prepared pan. Cover loosely with plastic wrap and let rise in a warm place until about doubled in size, about 1 hour.

Preheat oven to 450°F. With oiled fingertips, press indentations into the dough about 1 inch apart and 1⁄2-inch deep. Drizzle with olive oil. Sprinkle evenly with salt, cheese and herbs. Place in preheated oven and bake until deep golden and puffed with a crispy crust, about 10 to 15 minutes.

Allow to cool in pan for about 10 minutes before removing to a cooling rack. Carefully remove from pan to cooling rack and cool for another 10-15 minutes.

Wednesday, February 24, 2010

3rd in a Million Ways to Prepare Potatoes

So, I watched Secrets of a Restaurant Chef with Anne Burrell a few weeks back and she prepared a potato dish called “Pommes Chef Anne”. It’s funny that this show magically appeared, as I was putting together a post about one of my favorite potato dishes: Potato Pancakes. But Chef Anne’s dish looked so good; I thought I would forgo the potato pancakes this time and try her recipe out.

I ultimately made 2 batches on separate days, but I forgot, with the first one I made, to take pictures and that gave me an excuse to make it a second time. I modified Chef Anne’s recipe on both occasions because I felt I wanted a little more flavor.

The really nice thing about this recipe is it’s between a potato pancake and an au-gratin (without all the dairy and butter). Don’t get me wrong, there is cheese-Parmesan Cheese! One of my kitchen staples. But I rarely think of Parmesan Cheese as a heavy dairy product like Cheddar and other worldly cheeses.

So following the recipe, my first go at it I layered in thin slices of onion. This was absolutely delicious, but my second round I added thin slices of garlic and onion and it made the dish even better! I topped the second version with a drizzle of Serrano cream, which was the ultimate addition to flavor.

Sorry-I did not take pics with the cream on top. I was so hungry when I made this, that I completely forgot.

Here is the Recipe Link: Pommes Chef Anne

Serrano Cream
  • 3 fresh serrano chilies or jalapeños, seeded and chopped fine 
  • 1 large garlic clove, minced and mashed to a paste with 1/2 teaspoon salt  
  • 1/2 cup sour cream
Make the serrano cream:

In a blender or mini food processor blend together the chilies, the garlic paste, and the sour cream until the mixture is combined well. (Be careful not to overblend the mixture or the cream may curdle.) Force the mixture through a fine sieve set over a small bowl. The serrano cream may be made 1 day in advance, kept covered and chilled, and brought to room temperature before serving.